Hello all,
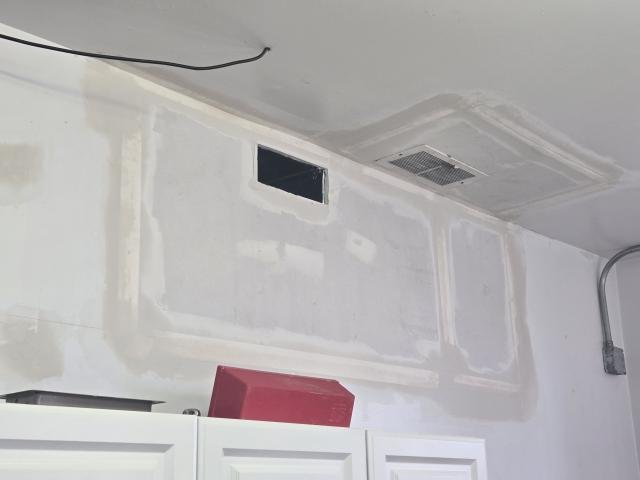
Here is another update on our hallway project. We have finished reconnecting all of the furnace vents and have a rough patch in place for the wall and ceiling in the kitchen as seen in the attached picture. If anyone has a use for some of the tin from the old duct work, let us know, else it will be disposed of.
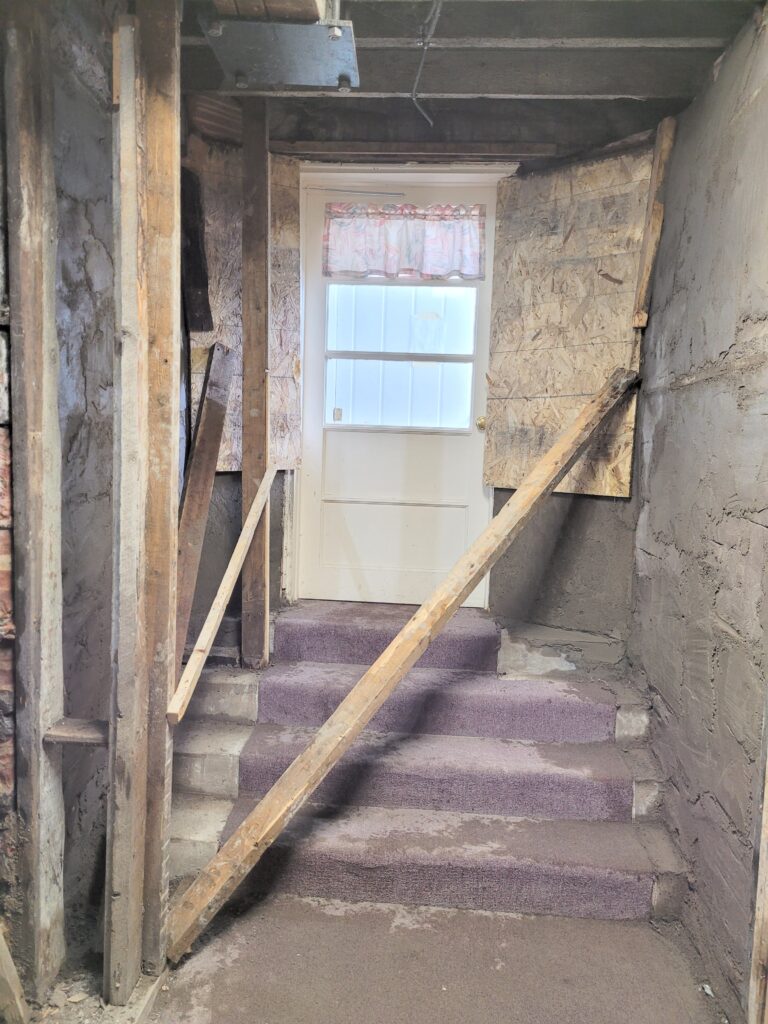
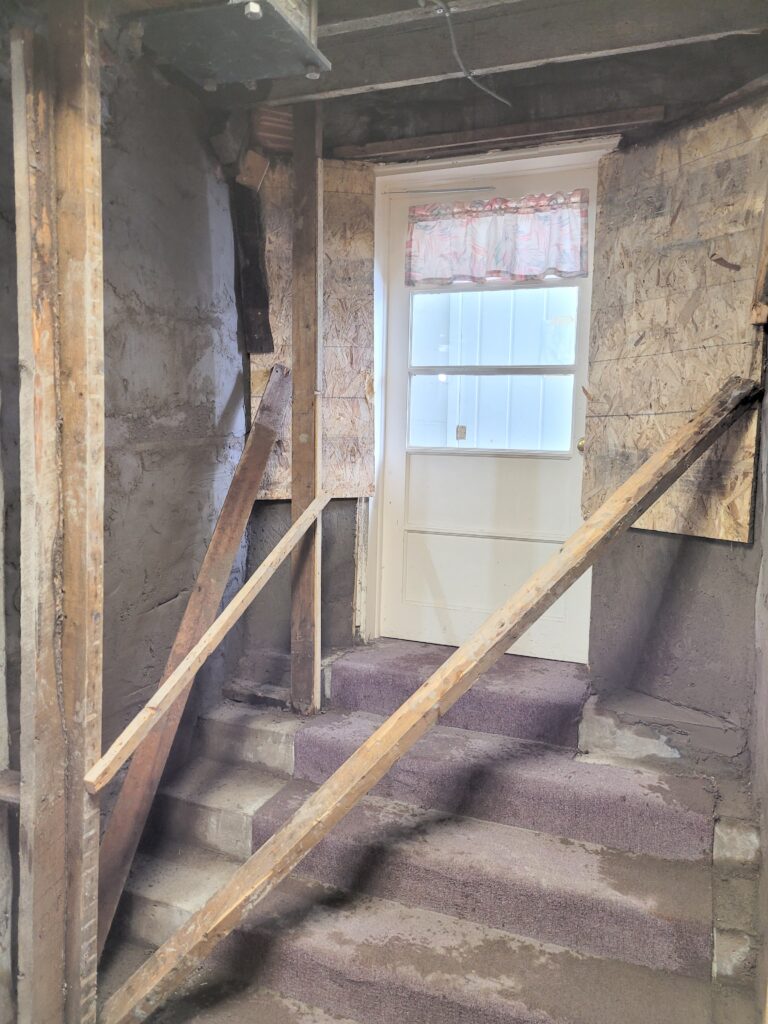
Now that the duct work is complete for this part of the project, we have started on the repairs to the wall near the entrance door. As many of you probably already know, good masonary work usually needs a little touch up once every 100 years or so. Given that we are closer to 125 years, it was no surprise that behind the sheetrock in the entrance way, we found quite a bit of failing or failed mortar around our basement stone work. Some of it was so bad that we were able to remove stones from the wall by just grabbing them with our bare hands and pulling them out. Some mortar had degraded to be just sand we could sweep away. So we removed as much as the loose stuff as we safely could and did some cleaning prep to rework the inside part the sandstone wall that supports the bell tower. We also needed to thin the wall near the entry door to get enough space to work a wheelchair onto the new proposed ramp. This required removal of about a foot of wall near the door which was done earlier.
Starting on Wednesday, we built a form to pour fresh concrete in front of the existing wall on either side of the doorway. That wall was poured in two sections, the lower part on Wednesday, and the upper part today. This should give us another hundred years for that wall and should stiffen it quite a bit again.. When voids in the wall are included, some areas poured on this wall are over a foot thick. We also back plastered the hallway wall on both sides to fill in the missing support that was needed and provide a flat surface for installing tile in this area. Much of this was out of flat by several inches and required two (maybe three) coats to build it back out where it needs to be. There are some pictures attached of this completed work. While it might not look like much, we used 15 five gallon pails of gravel and three 92lb bags of portland cement (all hand mixed and poured) for this work. Please be careful if you come in the basement door at the front of the church for the next day or so as you can see we have some braces in place yet which somewhat block the stairs. They will be removed tomorrow if all goes well.
We have located 4 boxes of closeout tile from Menards and 3 boxes of tile from the ReStore that we think are enough to complete this area. We expect the total cost of materials to be similar to the furnace work (around $500) for this area. We chose tile as it is the thinnest wall covering (so will provide the most space for the ramp/stairs) that we could see that would also be less susceptible to any moisture that might enter from the wall. You may remember that the wood and sheetrock had considerable hidden damage in this area from past moisture infiltration. We think tile with a moisture proof membrane behind it will eliminate this problem in the future and help to minimize dampness in this area where snow and other moisture can track in on shoes as well. Also tile should be less susceptible to damage if someone bumps it with a wheelchair as they come through the door.
In addition to possible tile work, with the wall now relatively straight and flat, we now can start to address the rough framing of the new ramp, stairs, furnace room wall, and mens bathroom door soon.
As always, thanks for your continued support and patience as we work on these improvements.
David